Search Website
Use images for your page
Images help users scan and understand content quickly—especially on landing pages and hub pages. But poor sizing or missing alt text can hurt the experience.
Images should be cropped/resized before uploading to the site.
Where do I find the required image dimensions?
- In the Component Library, each component page lists its specific dimension requirements.
- When editing a component, the page edit view usually includes notes about the recommended image sizes.
To make your images available, you need to upload them to your Cascade site first.
- Upload images to your site’s img (assets) folder — not navigation folders.
- You can create subfolders (asset folders) under img to stay organized (e.g.,
img/events,img/people,img/banners).
In components that use the WYSIWYG editor (most commonly Columns, Accordions, and Tabs):
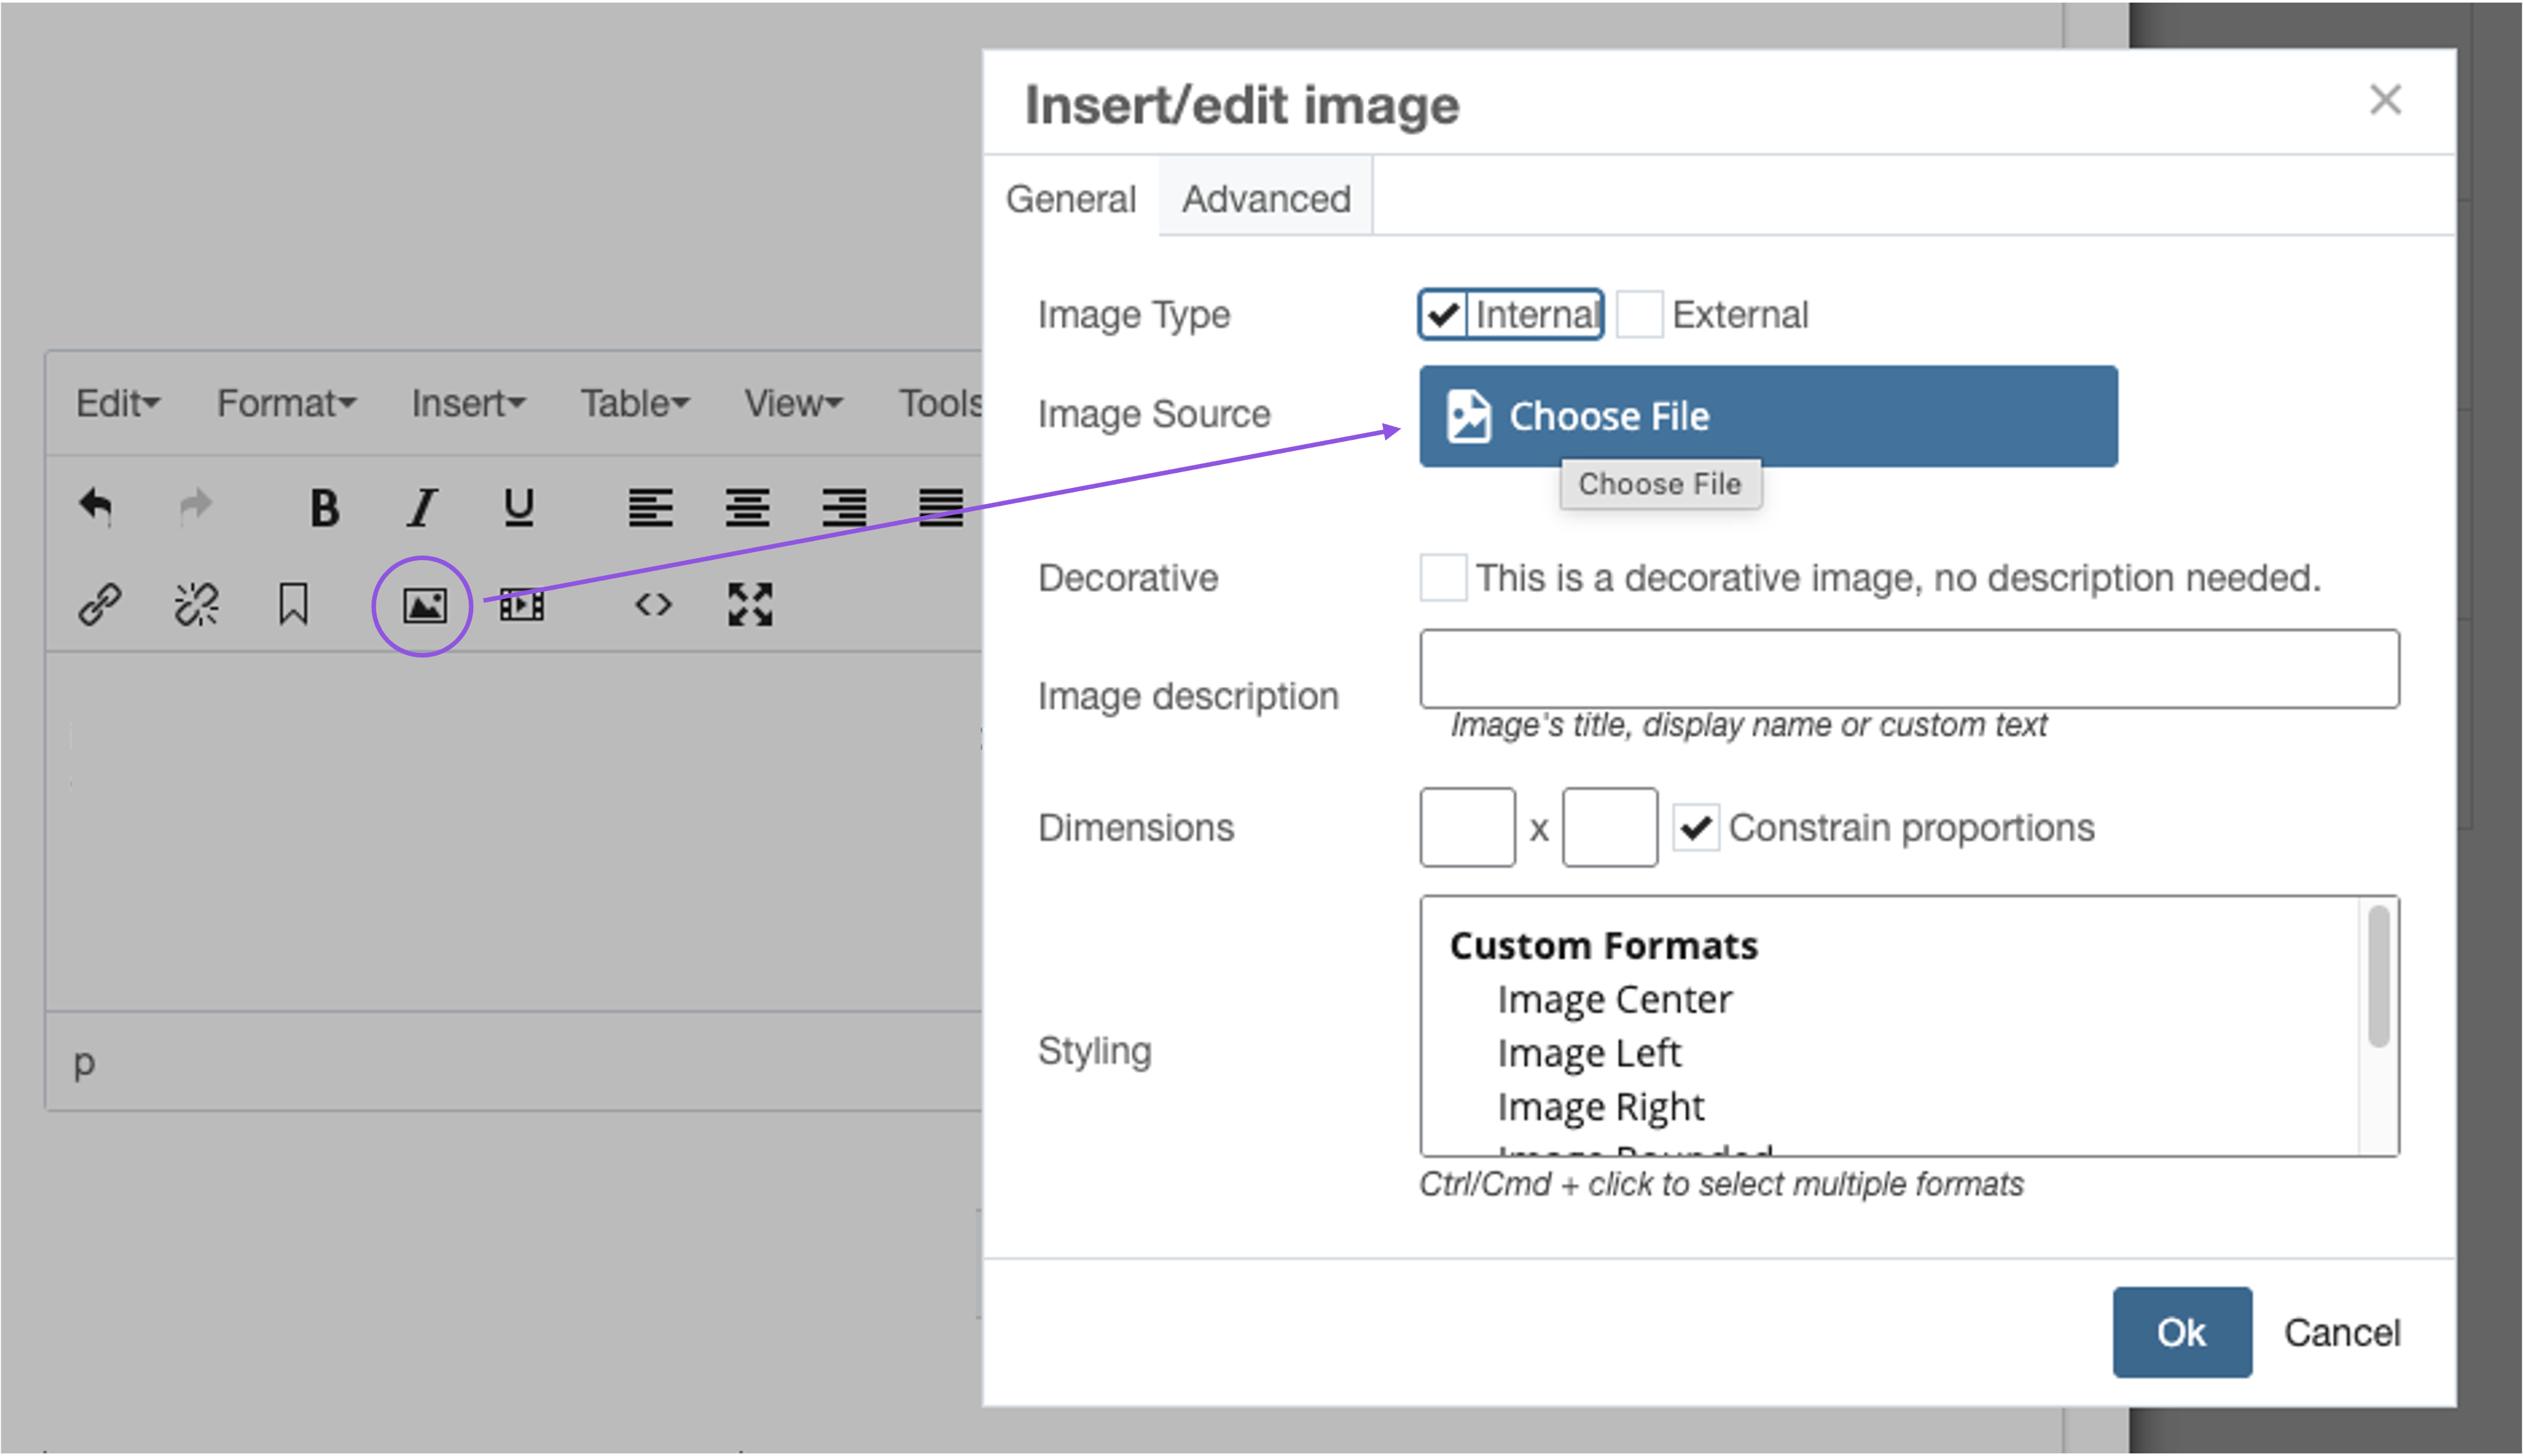
- Click the Image icon in the WYSIWYG toolbar.
- At Image Source, select Choose File.
- In the file picker:
- If you just uploaded the image, it will usually appear under Recent.
- If not, click Browse and navigate to the folder where you uploaded it (typically your site’s img folder or a subfolder).
- Select the image and insert it.
Note: Other components may not use the WYSIWYG image button. If a component requires an image, it will usually provide a dedicated image field or prompt you to add/upload the image directly in that section.
- Add an image description(alt text) when the image conveys meaning (people, places, activities, diagrams).
- Keep it short and specific (what someone needs to understand).
- If the image is decorative, check "This is a decorative image, no description needed."
Example:
- Good: “Two students in a simulation lab”
- Not great: “image” / “photo” / “banner”
-
Start with Schulich’s image repository (recommended): https://www.schulich.uwo.ca/web-training/photos.html
(High-quality, branded images—pre-sized with suggested alt text.)